Home
/ Looking Down Perspective - A Beginner S Guide To Perspective Art Rocket : Here's a final view on our composition, with the removed frame (as we no longer require the vanishing pointsto be visible).
Looking Down Perspective - A Beginner S Guide To Perspective Art Rocket : Here's a final view on our composition, with the removed frame (as we no longer require the vanishing pointsto be visible).
Looking Down Perspective - A Beginner S Guide To Perspective Art Rocket : Here's a final view on our composition, with the removed frame (as we no longer require the vanishing pointsto be visible).. Please note that due to the additional vanishing point, compared to the two point perspective, this style is more time consuming and should only be considered for final concept presentation. Yet all we've done is adjusted your eye level. The closer you place your vanishing points to the center of your canvas, the greater the distortion 3. Add the windows to your right building The bottles appear to have grown, shrunk or moved forward or backwards on the shelf.
See full list on design.tutsplus.com See full list on design.tutsplus.com To create a scene like that: All horizontal construction lines lead to a single vanishing point, based on the plane on which they are located on 4. Oct 31, 2019 · a low viewpoint is when you're looking at a scene from much lower than you would standing up.
How To Draw A City Looking Up And Down Illusion Youtube Perspective Drawing Lessons Illusion Drawings Optical Illusion Drawing from i.pinimg.com We're looking at it from a different angle so the first is the proverbial worm's eye view. Architectural exterior scenes (cityscapes) 2. For the sake of diversity, let's push this volume slightly behind our central one, and make it much taller! The roofline, the top of the door and top and bottom of the windows on these construction lines. Whenever you need to realistically render a large exterior scene, or a very intricate interior, this is the perspective style to go with. In the two final sketches i've drawn a line of bottles on a shelf. Define your street and pavement 5. For instance, if you were sitting on a chair, had crouched down onto your heels or, even lower down, sitting on the grass.
See full list on design.tutsplus.com
Yet all we've done is adjusted your eye level. Positioning the horizon low will help you create a view looking up while putting the horizon near the top will direct the viewer to look down. Draw it across the upper 1/3, center, or lower 1/3 of your paper, for instance. 2) scatter those objects on flat surface in front of you. Keep in mind that in the case of the center building, you can use the vertical lineto gauge the window dimensions. Remember, good observation is the key. (note the strong light blueframe under step 2 above) Define your perspective, or better said, what your position as the viewer will be. To create a scene like that: This will allow you to identify the windows via the intersection points with the construction lines leading to the right vanishing point. You might be on a ladder, up a hill, on the balcony of a tall building. Look carefully and draw what you see. We need to think about what proportions these buildings will have in comparison to the main one:
Now fill it with a bright colour. A wide building on the right side 2. On the other hand, in the lower sketch, the 's' (road) is much more compressed. The second has your eye level set on the centre of the house, as if you were standing up. In the first, imagine they are all looking directly at spot on the brick wall on the left directly in line with the height of their eyes from the ground.
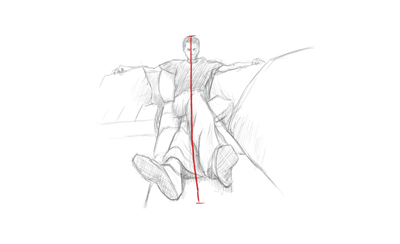
Looking Down Personal Perspective Walking Down A Dusty Path Stock Photo Download Image Now Istock from media.istockphoto.com Add two to three other buildings to the left and right of your central foreground building, to fill the scene. See full list on design.tutsplus.com Each one is slightly different. We're looking at it from a different angle so the first is the proverbial worm's eye view. It creates the illusion of looking down from a high viewpoint. They're all different because each figure is at a different height so they're seeing different things. Skyscrapers skyline look down perspective in dubai downtown in the evening aerial night timelapse. By connecting this line with the previously drawn grid, you create the vertical position of your posts.
That being said however, i recommend that in actual usage scenarios you just keep these techniques in mind, and rely on them just to build so called bounding boxes (less detailed containment volumes) to which you add details as it comes naturally.
Define your perspective, or better said, what your position as the viewer will be. N the three sketches, it's as if you're on an extendable ladder as you see the same building from three different points. You can do this by using the pavement lines as your intersection points. You might be on a ladder, up a hill, on the balcony of a tall building. I recommend using this style of perspective for the following scenarios: We will be building the right facade in the same style as the central building's facade, with the added benefit of not having to add as much detail as it's moving away from the main focal point. Moving forward, we will create the building on the immediate left of our main central volume. Taking the blue & purple examples at the top of this article, you need to extend construction lines on the facades of your building towards the horizontal vanishing points. To ensure that you have a firm grasp of the basic concepts presented here, let's take a look at this quick exercise. 3) view your objects from the top looking down. They all see the same brick from a different angle, so it will appear to each of them to be a slightly different shape. There are some points to consider when working in three point perspective. See full list on design.tutsplus.com
On the other hand, in the lower sketch, the 's' (road) is much more compressed. To identify the precise position where this volume is tangent with the ground plane, you will need to intersect the construction lines spanning from the top vanishing point all the way down to the lower margin of your canvas, with those spanning from the right vanishing pointup to the pavement. There are some points to consider when working in three point perspective. By connecting this line with the previously drawn grid, you create the vertical position of your posts. Add the windows to your right building
How To Draw A Person Lying Down from thevirtualinstructor.com All vertical construction lines lead to the third vanishing point 2. 3) view your objects from the top looking down. Define your perspective, or better said, what your position as the viewer will be. Yet all we've done is adjusted your eye level. Now that we've decided upon the final dimensions of our central volume, it's time to add another few elements to our composition. Now that the placement has been clarified, define your pavement and street, at the base of the building. Start by drawing the vertical line 9/10th above the horizon line. See full list on design.tutsplus.com
I strongly recommend you invest some time and practice before you decide to use this technique on a deadline.
If you see what i mean! We need to think about what proportions these buildings will have in comparison to the main one: 2) scatter those objects on flat surface in front of you. All you need to make the road are the two large 's' shapes, gradually coming together on the horizon. Concept art of any kind, particularly larger scenes 4. Please note that i've willingly opted to have a pathwaybetween the two buildings. See full list on design.tutsplus.com Hope you enjoyed reading this, and if you have any questions, don't hesitate to write in the comments below! Oct 31, 2019 · a low viewpoint is when you're looking at a scene from much lower than you would standing up. Yet all we've done is adjusted your eye level. In the next sketch they are all looking at the same brick. For the sake of diversity, let's push this volume slightly behind our central one, and make it much taller! A high viewpoint is when you're looking down on a scene.